Monthly Archives: February 2019

PROTO-CINEMA BLOG 10: Cyanotype Creative Process

So, I had planned to cut out the Dave Matthews Band symbol and place it on the cyanotype/sun paper; however today was so windy that I didn’t think it would be a good idea.

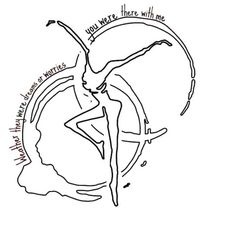
Figure 1: Dave Matthews Band logo

I chose it, initially, because DMB is one of my favorite bands AND because the logo of the band features this cool image of coffee stain rings, which I thought would be neat to recreate on the cyanotype.

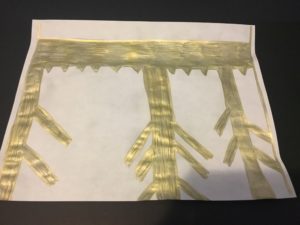
Because that wasn’t going to work today, I did two other prints.

The first print was of gaming paraphernalia, because I’m a huge board game nerd. I took a heavy bottle opener shaped like glasses and then surrounded it with gaming items: playing cards, dice, and a small pencil.

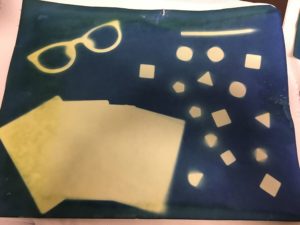
Figure 2: First cyanotype.


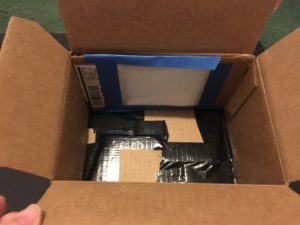
The second print was attempting a nature/animal theme. So, I had two cat figurines that I placed on the paper, along with a heart-shaped cookie cutter, and put two leaves along the top. This one didn’t turn out as good as the first one.

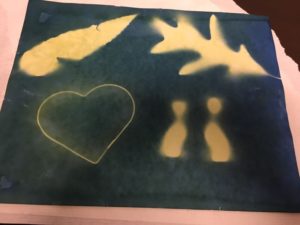
Figure 3: Second cyanotype.


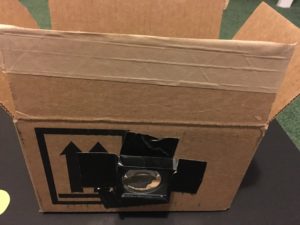
Because I forgot to bring my cell phone with me when I was doing these cyanotypes outside the library; here’s a photo of the objects used (minus the leaves).

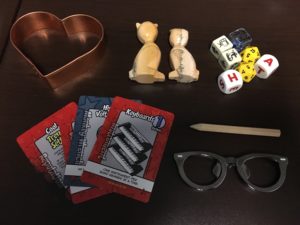
Figure 4: Items used for cyanotype print.

PROTO-CINEMA BLOG 9: Camera Obscura Creative Process

For the initial project, I attempted two “turn your room into a camera obscura” experiments.

First, I did the two lobster clasp hair clips with a dark window curtain around a toilet paper roll, as described in one of the class links. I forgot to take a picture of this one. My bad.

Second, I took the left-over poster board from my cabinet of curiosity and blocked out the window of the smallest room of my house. I then took another piece of poster board and duct taped a lens in the center of it. The lens I taped was a filter lens for my DSLR.

Figure 1: Lens in poster board; turn your room into a camera obscura.


Outside the window, we have a row of trees and some wooden fencing.

Figure 2: My drawing of what was projected on the wall.


Then, I read that we had to bring in a working camera obscura to class, and since I can’t bring my window and small room to campus, I tried making a box camera obscura (it doesn’t work, I don’t think).

Figure 3: Inside box camera obscura.


Figure 4: Outside/front of camera obscura.


Figure 5: Journal drawings from room camera obscura and box camera obscura.


The box camera obscura doesn’t really project anything, when I point it at the light, I just see a blurry light orb with a halo around it.

PROTO-CINEMA BLOG 8: CYANOTYPE

In “Herschel’s Cyanotype: Invention or Discovery?” Mike Ware talks about not only if the cyanotype was invented or discovered, but also the people and innovations that lead to and surrounded the cynaotype. There are a few things I found interesting about this reading.

First, the contrast between Herschel, the scientist, and Talbot, the producer/artist. Herschel’s interest was purely a scientific one. Ware notes that he was following in his father’s footsteps and hoped for “his investigations [to] vindicate … his father’s work” (371). His father did work on the electromagnetic spectrum and was the scientist who discovered UV rays. Talbot, on the otherhand, wanted to reproduce his artwork using ink.

Second, I found it incredibly interesting the painstaking nature of Herschel’s work. Ware says that he “carried out nearly seven hundred such photochemical experiements” (372). Although, the end of the article notes that his major discovery occurred with only three tests. But, the article does emphasize how many experiments Herschel conducted in his research, many of which failed, but three lead to this discovery.

Fourth, I find the lasting nature of his discovery to be incredibly fascinating. Ware says that the “recipe” Herschel developed in 1842 is the same one used today.


PROTO-CINEMA BLOG 7: CAMERA OBSCURA

The Standage reading gave details about how to construct a camera obscura. The reading included detailed instructions as well as blueprints (figures) showing how they can be made.

Mills’ article talks about the camera obscura and the painter Vermeer. Apparently, it is debated that his paintings were done from camera obscura projections. Mills demonstrates how and why this can’t be the case.

The Mills article also talks about the differences between types of lenses and defines important terms, such as focal length.

PROTO-CINEMA BLOG 6: CABINETS OF CURIOSITY CREATIVE PROCESS

For this project, my initial inclination was to make a cabinet of curiosity that follows the Svankmajer article: Creating a cabinet displaying all my collected oddities.

I collect all kinds of different things: movies, books, vinyl records, board games, coffee mugs, old government weather maps, post cards, weird clay and glass figurines, horror merchandise, Doctor Who merchandise, Marvel comics and merch, and crystals and stones. I could go on….

I like the idea of combining all this weird stuff together. I especially like the different categories Svankmajer talks about: Naturalia, Exotica, Scientica, etc.

However, to make the assignment more manageable, I decided to make a “Cabinet of Horror.”

Image 1: Photo from my creative journal

Image 1 shows my initial sketch for my cabinet in my creative journal. The first page shows the front of the cabinet, with doors that open. The second page is the inside of the cabinet. The shapes show where my photos will be placed (I’m taking photos of some of the horror items I have collected) and I’ll have flaps that uncover the items, like an advent calendar or like the museum card passed around in class.

Image 2: Actual-size plans for cabinet [Front]

Image 3: Actual-size plans for cabinet [Inside]


So, for the plans, I taped 4 11×17 sheets together; 2 for the front of the cabinet, 2 for the inside. Then, with a ruler, I decided where all my images were going.

Next, I will get sturdy poster board and attach the photos of my items and use other poster board or construction paper to make the flaps. Image 4 is a collage of all the items in the cabinet.

Figure 4: Horror items to be included in “Cabinet of Horrors”


Final Result:

Figure 5: Front of Cabinet


Figure 6: Inside of Cabinet


Note: Not sure this is worthy of being called “a work of art in itself,” as the assignment description requires. It is a representation of a collection, though.